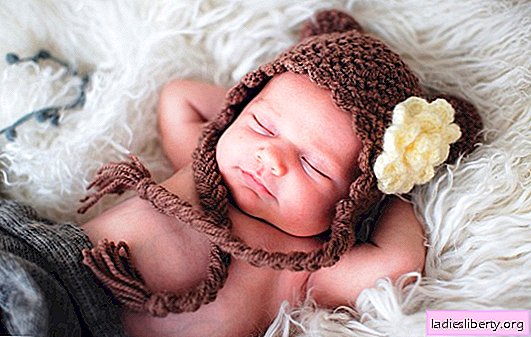
There is hardly a mother who would not care about the comfort of her newborn baby. Particular importance is given to his wardrobe.
Things for such a small child should be made of natural, anti-allergenic materials, soft and comfortable.
Daily demanded items of clothing for the baby include bonnets and hats sewn from a suitable fabric or crocheted or knitted.
Requirements for a knitted hat of a newborn
Mothers who can knit, intending to make a cap for a newborn on their own, it is necessary to take into account some important nuances:
• give preference to soft yarn, which includes wool and acrylic;
• the best choice is yarn with a thickness of about 250-300 m / 100 grams;
• knitting needles recommended for knitting hats - No. 2.5 - 4;
• the optimal choice of a cap model for daily wear - a simple cut style with a minimum number of ruffles or frills decorating it;
• advice from experienced mothers - to refrain from choosing a model of a hat with seams that could cause discomfort to the baby;
• for the competent calculation of the knitting fabric, you must use the table below.

Universal model of hats for newborns: schemes, description
An excellent choice in all respects for a knitted cap model for both a boy and a girl is the style described below with detailed instructions on how to knit a cap for a newborn with knitting needles.

To make such a cap, you will need to pre-prepare or purchase:
• straight knitting needles No. 1,5 for knitting gum products;
• straight knitting needles No. 2 for knitting the main fabric of the product;
• 50 gram skein of yarn combining wool and acrylic in equal proportions.
The knitting density of such a hat will be 28 loops per 10 centimeters of the canvas.
Step 1. On knitting needles with number 1.5, you need to dial 75 loops at the rate of 27 centimeters of the circumference of the face of the newborn.
Step 2. The dialed loops should be knitted with a 1x1 elastic band until its width reaches two centimeters.
Step 3. Having replaced the knitting needles with others, whose number 2, knitting is continued with the front surface, bringing the width of the fabric to eight centimeters.

Step 4. To form the bottom of the bonnet at the next stage of work, all available loops must be divided into three equal parts, and then continue knitting like the formation of the heel of the toe: the central part of the fabric is knitted with a loop in each next row, one from the parts adjacent to the sides.

Step 5. The caps connected by the described method, the caps begin to decrease, uniformly reducing for this purpose its width on both sides until, as a result, a canvas equal to three centimeters remains.

Step 6. At the final stage of making knitting caps for a newborn, it is made out with an elastic band. For these purposes, again use the needles No. 1,5. With their help, on both sides, starting from the bottom edge, they gain the required number of loops, which are knitted with the already used rubber band 1x1 until it reaches two and a half centimeters in width.
Step 7. At the end of knitting, the loops are closed and the bonnet ties are made.

Openwork hats of newborns: popular patterns, step-by-step description
The vast majority of mothers of little girls are wondering how to knit a hat for a newborn with knitting needles with the use of graceful lace that would fit a little girl's face.
The knitting pattern "Openwork rhombuses" is considered to be quite simple in execution and at the same time elegant, which will make the hat for the baby not only practical, but also elegant.

For the manufacture of the cap model shown in the photo, the following materials and devices will be needed:
• 50 gram skein of yarn, the length of which reaches 160 meters, combining cotton and acrylic in the composition;
• circular knitting needles No. 3.
Step 1. On the selected knitting needles, 57 loops are typed, which corresponds to 28 centimeters and is knitted with a pattern called "Boucle":
• in 1 row, all loops are knitted, alternating 1 front with 1 wrong side;
• in the 2nd row, the loops are knitted according to the formed pattern;
• 3 row - former facial knit purl, former purl - vice versa;
• 4 row and all other even knit like the second - repeating the pattern;
• from the 5th row, the algorithm described in the four previous rows is repeated.
Using this description, they knit 12 rows, which subsequently become the lapel of the cap.
Step 2. Having completed work on the lapel, we proceed to the implementation of the main pattern of the bonnet according to the scheme attached below.

It is necessary to take into account one important nuance: the number of loops of the main fabric should be divided by six and have seven additional loops + two edge.
Step 3. Following the pattern "Openwork rhombuses", knit 7.5 centimeters.

Step 4. Upon reaching the required width of the product, its loops are divided into three parts of the same number of loops, each of which consists of 19 loops.
Step 5. At this stage, it is necessary to reduce the loops, knitting the central 19 with the same pattern, capturing at the same time from the first and third parts one extreme loop in each row. As a result, the width of the web will be only 19 formerly in the center of the hinges.

Step 6. To give the bonnet the correct shape, in the next row you need to knit the loops like this:
• 1 edge;
• two loops of one front;
• two loops of one wrong side.
As a result, a dozen loops should remain on the knitting needles.
Step 7. On the wrong side of the product, turn off the strip associated with the letter. A set of loops is carried out:
• 55 for future ties;
• 15 from the first half, knitted with a pattern of "rhombuses";
• 10 loops on the bottom of the bonnet;
• 15 loops from the second openwork half;
• 55 loops for the second tie.
Step 8. The dialed number of loops is knitted with facial loops.
Step 9. The next pair of rows is performed using the initially used boucle pattern.
Step 10. The loops are closed along the entire length of the knitting.
Using the demonstrated patterns and descriptions, the baby's mother will no longer face the problem of how to knit a cap for a newborn with knitting needles.


