Doll houses appeared in the 17th century.
This hobby was characteristic of the wealthy ladies of England, Germany and Holland.
In those days, dollhouse was the size of a large wardrobe: a huge miniature multi-story world.
The best furniture makers of the country made such a miracle.
Only they had experience in manufacturing large-sized interior items, and therefore only they could make miniature dollhouses. It was a pleasure, of course, very expensive.

Nowadays, the production of toy houses has been put on industrial rails. A house of any shape and size can be purchased at the store. You can order a house of exclusive design. But such orders are rare and are made for sophisticated collectors. The price of such an order, as in the 17th century, is very high. You can also make a dollhouse with your own hands. This is completely uncomplicated. The selection of improvised material of our time is unusually large. Construction will take a lot of time, but the result will exceed all expectations. And it will greatly please you and your family.

To create a dollhouse you will need:
1. plywood with a thickness of 15 mm 633/473 mm (on the facade of the house);
2.2 plywood 15 mm 603/345 mm (for load-bearing floors);
3. plywood 15 mm 455/345 mm (for the upper base plate);
4. 2 plywood 15 mm 336/350 mm (for external walls);
5.2 plywood 15 mm 190/310 mm (for internal walls);
6. 2 plywood 15 mm 531/410 mm (for roof);
7. self-tapping screws with countersunk head 3/25 mm 30 pieces;
8. white paint 1 liter (dispersion);
9. red paint 0.5 liters;
10. colorless varnish for wood, so that the paint retains its color better and does not peel off over time.
From the tools:
1. circular saw;
2. jigsaw;
3. grinding machine;
4. drill / driver;
5. 50 mm drill;
6. sanding sheet No. 120-140;
7. meter;
8. pencil;
9. goats, boards 50/50 mm;
10. of the means of protection - glasses, gloves.

If possible, it is better to make a model of the house under the supervision of a master. Otherwise, try to learn how to work with a jigsaw on test material. There is nothing complicated in the work. It is required to get used to the principle of action of the cutting blade. For different surfaces (wood or metal), there are different types of paintings. For plywood, the smallest thread is suitable.
The creative process begins
1. The lines of the facade, floors, walls, slabs and roof are marked on plywood. Jigsaw details are cut. When cutting, plywood should fit snugly to the desktop and not “bounce”, otherwise cracks and chips will appear;
2. Use rulers and a pencil to mark windows. If desired, their number can be reduced or increased. The first hole in the future window is drilled with a drill so that a cutting jigsaw blade can be inserted into it. A compass is useful for marking the side round windows. The circumference is best sawed by a bench drill. For lack of such, a drill and a jigsaw will do;

3. Next, the doorways are marked. It’s easier to cut them. During sawing, safety precautions are observed: glasses are put on eyes and gloves on hands, a protective plastic window on a jigsaw is lowered;

4. All the resulting parts are polished with a machine;
5. Bevel edges are made on the roof parts at an angle of 45 °. The bevels are necessary not on the upper edge of the sidewalls and on both sides of the upper base plate at the junction of these two plates. For sawing such an angle, a circular saw or a jigsaw is suitable. For both tools, you can adjust the angle of the torch. The angle is necessarily firmly fixed on the tool itself. Cuts are made;

6. The resulting parts are ground;
7. Roof slopes need to be glued together. Parts are stacked to each other with the inside. Be sure to maintain a snug fit. Slopes (lower parts) can be glued with tape (as shown in the figure). He will act as a hinge;
8. Apply glue. Both halves of the roof are tightly pressed against each other. Excess glue is removed with a rag. Details are left to dry during the day;

9. The process of assembling the house. Firstly, walls are joined to each other by means of self-tapping screws. Before screwing in the screws, it is recommended to drill a hole for them to avoid cracks in the plywood when screwing. Secondly, the floor is screwed to the wall structure. Thirdly, inside the house floors are installed - two floors. Fourth, the walls are attached. It may be necessary to disassemble the external walls when installing the internal walls. Before disassembling, places of fastening of internal walls are pre-marked. You can circle them with a pencil. Later, these basting lines will be covered with paint;

10. The painting process. By this time (after a day) the roof can be painted red. If there is no varnish in the paint, then it is better to paint the surface with 2-3 layers after the paint dries. Between the application of a new layer, a period must pass for the previous layer to dry. Similar manipulations are made with the design of the house. The best option when painting is to apply the dye using a spray system. However, such a system is not available in every home. Therefore, a simple brush is used.

11. After the paint has dried, the roof is attached to the house. If necessary, screwed-in screws are tinted with paint.
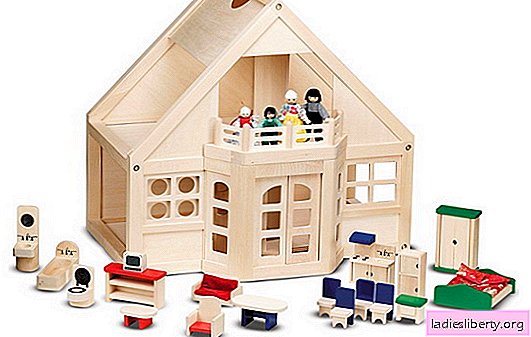
It is recommended to decorate the resulting dollhouse with curtains, curtains, toy furniture and interior items. And give the right to move in to the first small tenants.